M1 Rifle Sighting Target. Notice the little notch a few inches below the 1000 yard line.
I had a new barrel put on my Quadlock a month ago. It is a 30″ 5R 13″ twist Kreiger barrel. Saturday was the first opportunity I have had to sight it in. For some of you reading this that are fellow competitors this is nothing new. But in my short life of shooting Palma

Original label of M72 match ammo issued at Camp Perry. Photo courtesy of Ray Meketa from article for The Rifleman’s Journey.
rifles I have only changed barrels 2 – 3 times. And someone has always set it up for me where all I had to do was show up at the range and shoot it and adjust accordingly. This time I made sure Jim Cloward, my gunsmith, did nothing without me so I could understand the process better. It is not really that difficult but it is certainly interesting. The rifle is meant to shoot up to 1000 yards but I sighted it in at 50 and 100 yards.
It is still pretty old school how this is done. This target shown at top of this page is a sighting target used for M1 rifles and using M72 match ammo. M72 is a military term for 173 grain bullet for a 30-06 rifle. Basically it is what was issued. How old is this? Apparently this ammo has

Palma rifle front sight mount
not been made since the 60s! They really do not print these targets anymore. Jim thought I should save it and paste up to reuse again. He only has half a dozen or so left as well. But it works great! First things first. Once the barrel is installed the front sight base has to be put on. Now this has to be as straight up and down as possible. Eyeball as best as you can and then put front sight on. Then put the rear sight on. Now the front and rear sights need to be exactly level to each other. Who needs an actual bubble level when you can eyeball it? We laid the rifle

Palma rifle front sight attached
down on side and put a metal straight-edge on both sights as seen in photo. Look level to you? Yep! Okay done. (Trust me, some people would roll over in grave knowing it was done this way with out a proper level) Now we bore sight it. Again the rear and fright sight pictures need to be as level as possible to make sure we get on paper at 100 yards to start. There is a little gizmo called a bore sight collimator. You attach it to the barrel in front of the front sight. Look through the rear sight and an X in the collimator should be in the center of the ring in the front

Palma rifle rear sight attached to base.
sight. Done. Next step is getting behind the rifle.
Being more comfortable in position than bench rest shooting I chose to sight in as I normally shoot. We set a basic bulls eye down at 100 yards and found the center of that. Now another little detail one needs to think about is the location of your zero on rear sight and front sight. There are notches on both. I want to make sure I leave myself room for adjustments to raise or lower sights. So they need to be comfortably in the middle of

Bore sight collimator attached to front sight
the adjustment range of the sights. As you can see in the photo of the front sight that there are notches that are numbered. I need to have my “500 yard” zero at a point that I have room to lower the front sight so I can make it back to 1000 yards without running out of notches. Same concept for the rear sight. Each of the notches on the front sight are worth approximately 5-6 minutes. With a good 100 yard zero we then moved over to the M1 plumb target at a closer 50 yard distance. When hanging the target you also hang a plumb line in front of it and make sure that

Leveling the front and rear sights. Eyeballing it!
center vertical line is straight. Very important to help make sure your elevation is perfect. I then set my sights at what should be 1000 yards from that 100 yard zero. I brought the front sight down 25 minutes and the rear sight up 12 minutes. One just knows this okay? If you look closely at the target you will see a line at near the top with 1000 yards marked on it. A few inches down from that is a tiny line or notch that is actually my 1000 yard mark. This notch is 19″ above the bulls eye at the bottom that I am aiming at. Remember, I am using completely different ammunition and the length of my barrel is much longer than an M1. Much flatter trajectory.

Plumb target with my rounds. Shots at the actual 1000 yard mark were because I missed a notch on sight.
I want my shots to hit that little notch just to the left side of the plumb line. In this lower photo of the target with shots in it you can see this. Why to the left side? My interpretation is that since the twist of the barrel is to the right then your bullet spins that direction. Like throwing a football. By the time it reaches 1000 yards it will be at the center of that line. (Umm not the football) Eh Voila! I have my 1000 yard sight setting and since I know my “come-ups” to go backwards to 900, 800 and 600 I can easily get on paper and finely tune it then.
Well I think it is interesting anyway. Everyone has their own way of doing this. I like this old school method. Thank you again Jim for your help!
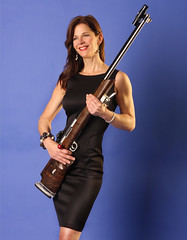
30CalGal! “Shoot Like A Lady! If You Can…..”